タイトルのままですが、Ubuntu Server 20.04LTS版に、NGINX、MariaDB、PHP 7.4をインストール・セットアップする手順を記事にしました。
具体的なバージョンは以下の通りです。
- Ubuntu Server 20.04 LTS
- NGINX 1.17.10
- MariaDB 10.3.22
- PHP 7.4.3
この記事の通りに最初からやればセットアップできると思います(間違いがあればすみません。でも責任は負えないので自己責任で…)。
ちなみに、前回の記事(Ubuntu Server 20.04LTSインストール)は以下になりますが、変更点があり、今回はVMware Player上で実施しています。

VMware PlayerでネットワークアダプタをNATにしてホストOSとゲストOSを通信させる場合のIPアドレスの設定などは、以下の記事を参考にして下さい。

NGINXインストール
まず、パッケージ情報を最新化。
$ sudo apt updateaptコマンドの詳細はubuntuのマニュアル[英語]で説明されています。
補足ですが、upgrade、searchなど他のコマンドを実行する前には必ずupdateを実行するようにします。
次に、NGINXをインストール。
$ sudo apt install nginx確認メッセージがでるので「Y」を入力。

終わったら、正常にインストールされたか確認します。
$ systemctl status nginx下のように、Activeの行にactive (running)と出ていれば大丈夫です。
inactive (dead)と出ていれば起動していません。

また、2行目に … /nginx.service; enabled; と「enabled」と出ていれば自動起動がONの状態です(自動起動がOFFだとdisabledと出ます)。
これで、NGINX自体のインストールは終わり。
簡単です。
ファイアーウォールの設定
以下のコマンドで、HTTP(80/TCP)、HTTPS(443/TCP)について、クライアントからの接続を許可します。
$ sudo ufw allow 80/tcp
$ sudo ufw allow 443/tcp
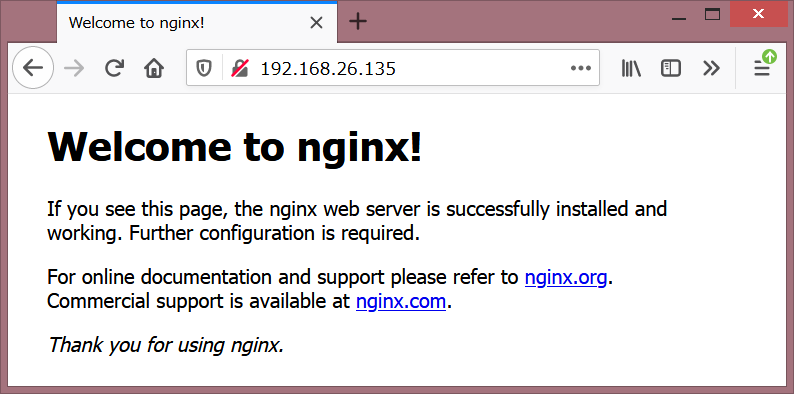
$ sudo ufw reload試しにホスト側OSのブラウザで確認してみます。
ゲストOSのIPアドレスが分からない(忘れた)場合は、以下のコマンドで確認可能です。
$ ip address show赤で囲んだ箇所がゲストOSのIPアドレス。

ブラウザのURLには「http://IPアドレス」と入力。
できていれば、こうなります。
MariaDBインストール
DBMSとしてMariaDBを入れます。
以下のコマンドを入れます。
$ sudo apt install mariadb-server mariadb-client確認メッセージが出るので「Y」を入力して、エンター押下。

起動しているかを以下のコマンドで確認します。
$ sudo systemctl status mysqlactive (runnning) と出ていれば大丈夫ですね。

次に、MariaDBをよりセキュアに使うためのセットアップスクリプトが予め用意されているので、実行します(詳細を知りたい方はMariaDB本家ページ[英語]を参照下さい)。
$ sudo mysql_secure_installation[Y/n]の箇所ですが、rootパスワードの変更はしなくて大丈夫なので、そこだけ「n」にし、後は「y」で問題ないと思います。
メッセージ全文を載せましたので、参考にして下さい。
NOTE: RUNNING ALL PARTS OF THIS SCRIPT IS RECOMMENDED FOR ALL MariaDB SERVERS IN PRODUCTION USE! PLEASE READ EACH STEP CAREFULLY!

In order to log into MariaDB to secure it, we'll need the current password for the root user. If you've just installed MariaDB, and you haven't set the root password yet, the password will be blank, so you should just press enter here.

Enter current password for root (enter for none): [rootパスワードを入力]
 OK, successfully used password, moving on...

Setting the root password ensures that nobody can log into the MariaDB root user without the proper authorisation.

You already have a root password set, so you can safely answer 'n'.
Change the root password? [Y/n] n
 ... skipping.

By default, a MariaDB installation has an anonymous user, allowing anyone to log into MariaDB without having to have a user account created for them. This is intended only for testing, and to make the installation go a bit smoother. You should remove them before moving into a production environment.

Remove anonymous users? [Y/n] y
 ... Success!

Normally, root should only be allowed to connect from 'localhost'. This ensures that someone cannot guess at the root password from the network.

Disallow root login remotely? [Y/n] y
 ... Success!

By default, MariaDB comes with a database named 'test' that anyone can access. This is also intended only for testing, and should be removed before moving into a production environment.

Remove test database and access to it? [Y/n] y
 - Dropping test database...
 ... Success!
 - Removing privileges on test database...
 ... Success!

Reloading the privilege tables will ensure that all changes made so far will take effect immediately.

Reload privilege tables now? [Y/n] y
 ... Success!

Cleaning up...

All done! If you've completed all of the above steps, your MariaDB installation should now be secure.

Thanks for using MariaDB!
MariaDBにログインできるか確認してみましょう。
-uの後にユーザー名を入れ、-pオプションを付けるとログイン時にパスワードが求められるようになります。
$ mysql -u root -pログインに成功すると以下のようになります。
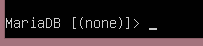
ここまでで、MariaDBのインストールができました。
PHP 7.4インストール
次に、PHPをインストールします。
$ sudo apt install php php-fpm php-common php-mysql php-gd php-cli php-mbstring確認メッセージが出たら、「Y」、エンターを押します。
途中、赤字で「Failed to start The Apache HTTP Server.」と出ますが、無視して大丈夫です。

各パッケージの簡単な説明
以下、インストールしたPHPの各パッケージの簡単な説明です。
php,php-common
PHP本体と共通パッケージ。
php-fpm
FPM (FastCGI Process Manager)は、サーバー負荷軽減のためのFastCGI実装(詳しく知りたい方はPHP公式ドキュメントを参照下さい)。
php-mysql
MySQL(MariaDB)のためのモジュール。
php-gd
画像処理のためのモジュール(GD)。
php-cli
PHPのコマンドラインインタプリタ。
php-mbstring
マルチバイト対応モジュール。
要は日本語対応のために必要なもの。
ちなみに、「ubuntu packages」のサイトから、各パッケージの説明や依存関係を調べることができます。
調べる際、「Distribution」にはバージョン番号ではな開発コードネームを入れる必要があり、今回の場合(20.04)だと「focal」を選択します。
開発コードネームの検索は、ubuntu wiki – Releasesで調べることができます。
設定ファイルの編集 (FPMセットアップ)
PHP7.4-FPMが正常にインストールされ、自動起動されているかを確認します。
$ sudo systemctl status php7.4-fpm
active (runnning)と出て、enabledと表示されていればOKですね。
つぎに設定ファイルを編集します。
以下のNGINXのフォルダに移動。
$ cd /etc/nginx/sites-available/編集する元ファイルのバックアップを取ります。
$ sudo cp default default.original
nano (テキストエディタ)でdefaultを開きます。
viでも問題ありませんが、nanoのほうがより親しみやすいインタフェースなので、今回はこちらを使います。
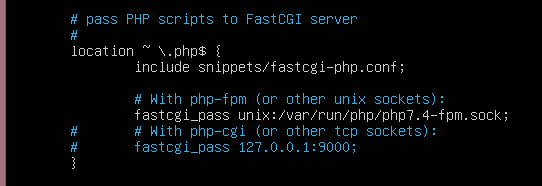
$ sudo nano default「location ~ \.php$ { 」で始まる箇所を探します(以下の通り)。
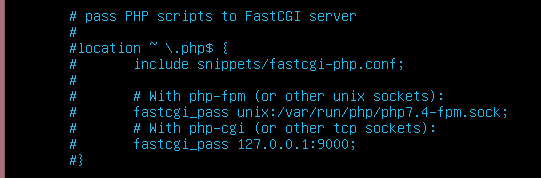
コメントを以下のように外します。
Control + o (オー) を押して保存します。
ファイル名を聞かれますが上書き保存するので、そのままEnter。
Control + x を押して終了します。
PHP7.4-FPMを再起動しましょう。
$ sudo systemctl restart php7.4-fpm次のコマンドを実行し、問題なく実行できているか確認します(active (running)が出ていればOK)。
$ systemctl status php7.4-fpmNGINXも同様に再起動し、問題なく起動できていることを確認します。
$ sudo systemctl restart nginx$ systemctl status nginxこれで、設定作業は終わり。
動作確認
PHPで作ったページが問題なく表示できるか、確認します。
Webページのファイルは、/var/www/html/の配下に置きますが、htmlディレクトリの所有者と権限を変えて、インストール時に作成した通常のユーザーでもファイルを作成するようにしておきます。
まず、/var/www/へ移動します。
$ cd /var/www/つぎに、htmlディレクトリの所有者をインストール時に作成したユーザーに変えます。
$ sudo chown user:user html権限を変えます。
$ sudo chmod 775 htmlhtmlフォルダに移動します。
$ cd htmlnanoで、info.php というファイルを作成します。
$ nano info.php以下を入力します。
<?php
  phpinfo();
?>
保存して、終了します。
ホスト側のブラウザから、
http://ゲストOSのIPアドレス/info.php
と入力し、以下のように表示されたら成功です。

これで、PHPのインストールはできました。
PHPとMariaDBの連携テスト
テスト用DBとユーザーの作成
まず、MariaDBにテスト用データベースとユーザーを作成しましょう。
データベース名:testdb
ユーザー名:testuser
とします。
まず、MariaDBにログインします。
$ sudo mysql -u root -pテスト用DBを作成します。
MariaDB [(none)]> create database testdb;ユーザーを作成します。
パスワードは適当に設定します。
MariaDB [(none)]> create user 'testuser'@'localhost' identified by 'password';権限の設定をします。
MariaDB [(none)]> grant privileges on testdb.* to 'testuser'@'localhost';これで、テスト用DBとユーザーは作成完了です。
existで抜け、念のためにテスト用ユーザーでログインしてみましょう。
$ mysql -u testuser -pログインできたら、問題なく作成できています。
テスト用PHPページの作成
/var/www/html/の下に、dbtest.phpというファイル名で以下のようなphpファイルを作成します。
作成の仕方はもう大丈夫ですよね…。
<html>
<head>
  <meta charset="UTF-8">
</head>
<body>
<?php
  try {
      $dbh = new PDO('mysql:host=localhost;testdb', 'testuser', 'password');
      print('Success!');
  }
  catch(PDOException $e){
      print($e->getMessage());
      die();
  }
?>
</body>
</html>
保存して、ホスト側OSから確認します。
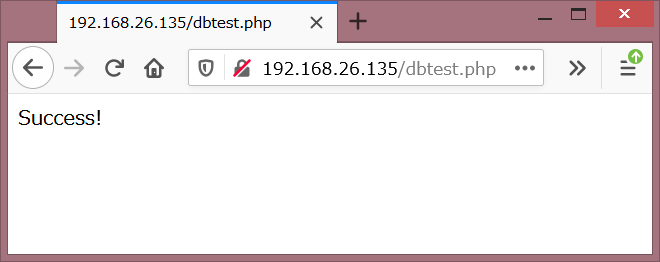
Success!と出ていれば、大丈夫です。
これで、Ubuntu ServerにNGINX、PHP、MariaDBをインストールすることができ、動作確認もできました。
次回は、phpMyAdminを入れてみたいと思います。
以上です。
終わり。
※2020/6/18追記
phpMyAdminインストール手順は以下です。
ご参考までにどうぞ。